
Nesting in CSS
A brief intro to the new CSS Nesting module
The ability to use nesting in CSS has been around for well over 10 years now. If you’ve used LESS or SASS, then you’re probably no stranger to how it works. But you’ve never been able to achieve this natively in the browser without a CSS preprocessor, until recently!
In this article, we’ll see how the CSS Nesting module works, examples of how to use it, and tradeoffs you should consider with this new feature.
Why Use It?
In large projects you usually want a certain level of specificity when writing your styles. This is to prevent style collisions with other similarly named selectors and is important if your project doesn’t use a methodology like BEM or scoped styles like CSS modules.
When you use nesting, the nested selectors will only apply within the context of the parent selector.
Using nesting also helps with readability, prevents repetition, and can reduce the overall size of your CSS.
Let’s look at an example of some basic header styles.
.header {
  display: flex;
  justify-content: space-between;
  align-items: center;
  padding: 14px;
}

.header h1 {
  margin: 0;
  font-size: 20px;
}

.header .nav a {
  font-size: 16px;
  font-weight: bold;
  margin-left: 14px;
  color: #008E95;
}

.header .nav a:hover {
  color: orange;
}
The same can be rewritten to use nesting.
.header {
  display: flex;
  justify-content: space-between;
  align-items: center;
  padding: 14px;

  & h1 {
    margin: 0;
    font-size: 20px;
  }

  .nav {
    & a {
      font-size: 16px;
      font-weight: bold;
      margin-left: 14px;
      color: #008E95;

      &:hover {
        color: orange;
      }
    }
  }
}
You’ll notice that the .header selector is now used only once at the top level. This block of code is now much easier to scan.
At first glance, this doesn’t seem like a big change, but it makes a meaningful difference in large projects because the amount of code you save by not repeating selectors really adds up quickly.
Nesting can also help with future maintenance of your code. If you ever need to remove these styles, it’s obvious everything within the curly braces is related and can be safely removed.
You can also nest media queries.
.header {
  ...

  .nav {
    display: none;
  }

  @media (min-width: 480px) {
    .nav {
      display: block;
    }
  }
}
Now everything related to .header is all in one place, media query included.
Using the Nesting Selector (&)
You may have noticed the use of & in the previous example. This is referred to as a “nesting selector”. In some scenarios its optional, and in others, it’s required.
Nesting selectors were needed in our first example because we wanted to select HTML elements. Both of these require the &.
.header {
  & h1 {}

  .nav {
    & a {}
  }
}
Another scenario where using nesting selectors is required is for compound selectors.
When using compound selectors in nested CSS you have to use the&nesting selector. This is because the browser will automatically add whitespace between selectors that do not use the&nesting selector. - MDN Docs
Let’s say we have a navigation with anchors that receive an active class. The link color should be orange when active or hovered, so the selector should be .nav .link.active and .nav .link:hover.
.nav {
  .link {
    color: blue;

    .active,
    :hover {
      color: orange;
    }
  }
}
The above doesn’t work because it equals .nav .link .active. To prevent the additional space from being added, add an &.
.nav {
  .link {
    color: blue;

    &.active,
    &:hover {
      color: orange;
    }
  }
}
When it comes to the nesting selector, there are a lot of scenarios we didn’t cover. To see more examples, view the official CSS nesting spec here.
Drawbacks
Now that we’ve seen how it works, what are some drawbacks of using CSS nesting?
Nesting too deeply
One thing to keep an eye on is how deeply you nest. Typically you should only nest as deeply as you need to. A general rule of thumb is somewhere between 2-5 levels deep. Anything more than that and your selectors might be overly complicated.
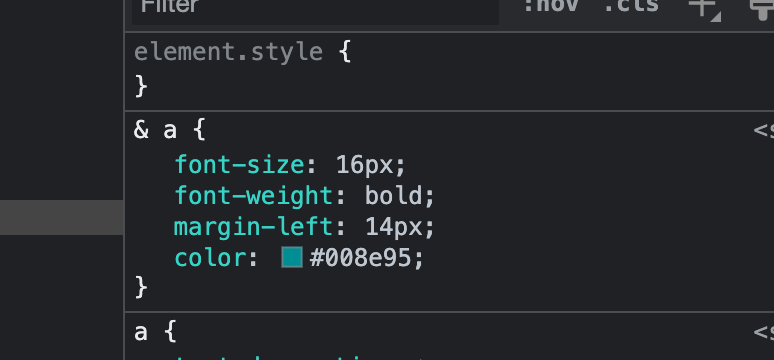
Debugging Support
Viewing nested CSS in Chrome devtools is currently a bit limited. You can see the child styles being applied, but you don’t get the full context of the selector. This will likely be more robust in future browser versions.
No Concatenation
When using nesting in CSS preprocessors, you can automatically create new selectors using nested styles.
For example, the below would equal .header-dark.
.header {
  &-dark {}
}
The CSS nesting module doesn’t support this, at least not yet. You can read more about it in the spec.
Browser Support
At the time of this writing (September 2023) all modern browsers now support CSS nesting.
But what if you need to support older versions that don’t?
The first option is to use something like PostCSS. This lets you author your CSS using nesting, and output it in a way that all browsers will understand, regardless of support.
You can also use feature detection to see if a browser supports nesting.
The first way to do this is just by using nesting. The CSS below is only applied if the browser can support it.
.nesting-available {
  display: none;
}

html {
  & .nesting-available {
    display: block;
  }
  & .nesting-unavailable {
    display: none;
  }
}
You can also use the @supports method. To read more about how this works, see here.
@supports (selector(&)) {

}
This helpful codepen shows more in-depth examples of the two feature detection approaches above.
How to use this feature detection and provide a fallback remains a bit unclear. It seems as though you would need to maintain two different versions of your styles - one that uses nesting and another that doesn’t. That definitely doesn’t seem very scalable though, and maybe PostCSS is your best option for now.
If anyone actually knows the answer to this without using additional tooling, I’d love to know - @letsbuildui on Twitter. I’ll update the post and give you a shoutout!
Summary
The CSS Nesting module allows for nesting in CSS without a preprocessor, which can improve readability and reduce repetition. If you've been using a CSS preprocessor just for the ability to use nesting and variables, then you may not need it anymore!
Since this feature is now supported in all major browsers, CSS nesting can be used in production so long as you have a backup plan if you need to support older browsers.